Berry Cake, Made Simple

Chandan Singh
| 19-11-2026
 · Food Team
A berry cake looks fancy in the bakery case, but the version you make at home doesn't need pastry school or a lengthy session with a stand mixer.
It needs a sponge that stays soft, cream that holds its shape, and berries that don't turn the whole thing soggy. The method below covers baking the base, preparing the filling, and assembling the cake.
Ingredients
The sponge ingredients are listed first, followed by the cream filling and fruit. Separate the eggs before starting, keeping the yolks and whites in separate bowls. You'll need:
- 4 large eggs, separated
- 120g cake flour
- 120g granulated sugar
- 40g whole milk
- 40g neutral oil
- A pinch of salt
- 400 ml heavy cream, chilled, plus extra if needed to correct over-whipping
- 40g icing sugar
- A teaspoon of vanilla extract
- Strawberries, raspberries, or blueberries, as needed
Steps
Follow the numbered steps in order, allowing the sponge to cool completely before preparing the filling. Have a 20 cm round tin ready and preheat the oven to 170°C (340°F). Proceed as follows:
1. Warm the milk and oil together until just steaming. Whisk them into the yolks with half the granulated sugar. Sift in the flour and salt, then fold gently until combined.
2. Whip the egg whites with the remaining granulated sugar to soft peaks. Fold them gently into the yolk mixture, then transfer the batter to the tin.
3. Bake for about 25 minutes. Check that a skewer comes out clean and the center feels springy. Let the sponge cool completely before adding cream; warmth will soften the filling and make assembly difficult.
4. Chill the bowl and beaters before whipping the cream. Begin at low speed, then gradually increase the speed as the cream thickens. Add the icing sugar gradually when the beaters begin leaving visible trails, and gently stir in the vanilla near the end.
5. Stop when the cream holds firm peaks but still looks smooth and spreadable. Check its texture frequently rather than relying on a fixed whipping time. Mixer speed, cream temperature, and the equipment used all affect how quickly it reaches this stage.
6. Wash the berries and pat them dry on paper towels. Hull and thinly slice any strawberries. Handle raspberries gently because they collapse easily, and keep them whole for scattering between the layers.
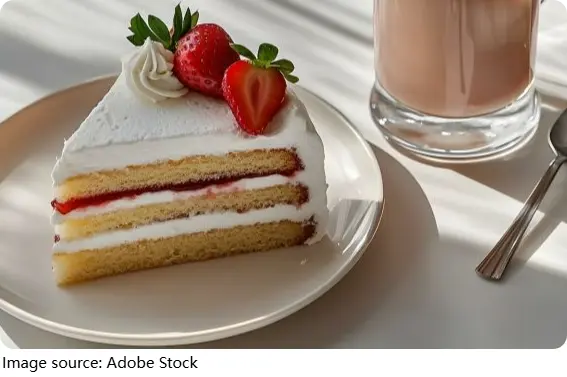
7. Slice the cooled sponge into two even layers. Spread a thin layer of cream over the bottom half, scatter berries over it, and add another thin layer of cream to hold the fruit in place.
8. Place the top sponge on gently and cover the cake with the remaining cream. Smooth the sides with a small offset spatula or bench scraper. Chill the assembled cake for at least an hour before slicing so the filling can firm up.
Keep the cream smooth
Cold cream whips well because its lipids helps support the air bubbles incorporated during beating. Chilling the equipment helps it stay cold longer. Starting slowly also builds smaller bubbles and avoids warming the cream too quickly, helping create a more stable foam.
Once the cream begins holding peaks, it can become overwhipped quickly. If it starts looking grainy, slowly drizzle in extra cold cream with the mixer running at low speed until it becomes fluffy again. Stop adding cream when the texture recovers; the amount needed depends on how far it was overwhipped.
This correction won't work once the cream has turned into butter, with yellowish clumps and separated liquid. At that point, start again for the cake filling. Watch the bowl closely throughout whipping rather than leaving the mixer running unattended.
Avoid sliding layers
Resist the urge to pile extra berries between the sponge layers, since too much fruit can push cream out the sides. Keep the filling relatively level rather than leaving a mound in the center. Leave off the suggested sugar dusting, which would encourage the berries to release more juice.

Store leftovers covered in the fridge for up to two days. Use a cake cover that clears the frosting rather than pressing wrapping directly against the cream.